Custom Mode is a feature within our plugin that allows users to generate content with greater flexibility compared to Express Mode.
While Express Mode provides one-click content generation, Custom Mode gives users the ability to customize all settings to create content tailored to their specific needs.
How to Use Custom Mode
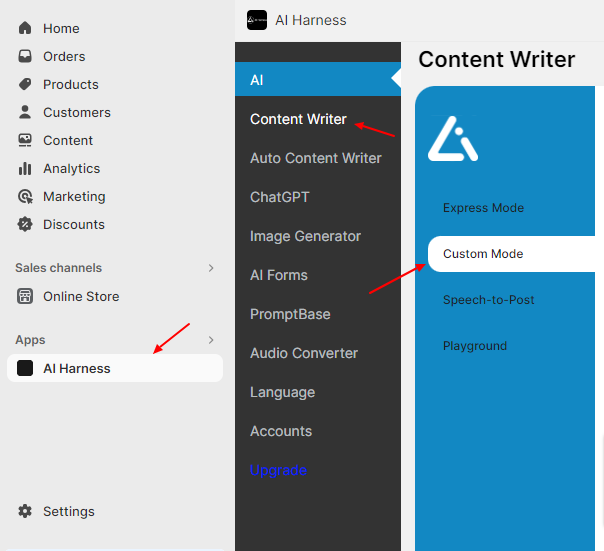
Go to the Content Writer within the plugin and switch to the Custom Mode tab.
Step 1: Choose Your Title
- Go to the Custom Mode tab within the Content Writer plugin.
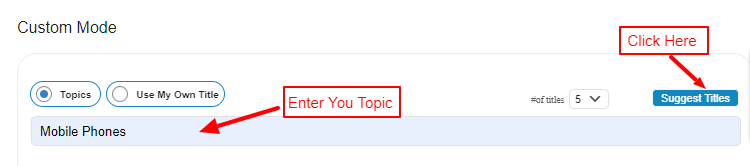
- On the Top , you’ll find two radio buttons: Topic and Use My Own title.
- If you choose Topic:
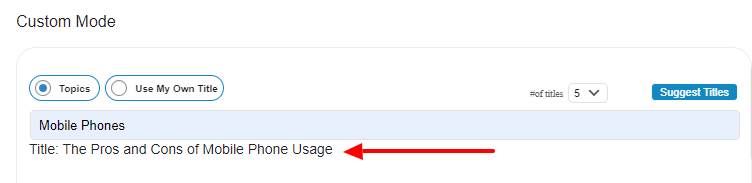
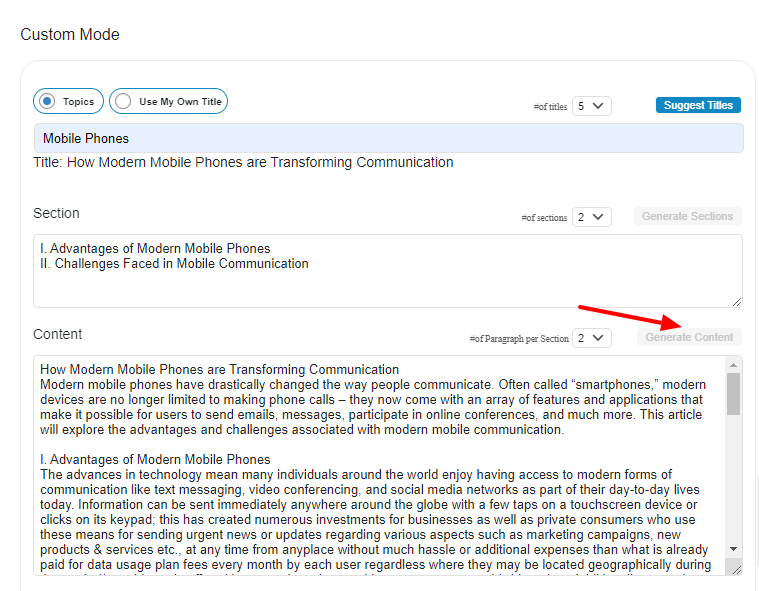
- Enter a topic (e.g., “mobile phones”) in the text field below the radio buttons.
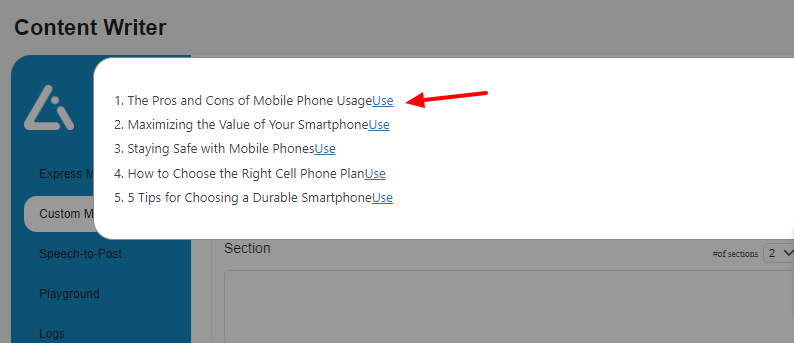
- Click on Suggest Titles. Our plugin will retrieve title suggestions for the given topic.
- A modal window will appear, displaying the suggestions.
- Select one of the suggestions click the Use This button.
- The selected title will be appended to the text field.
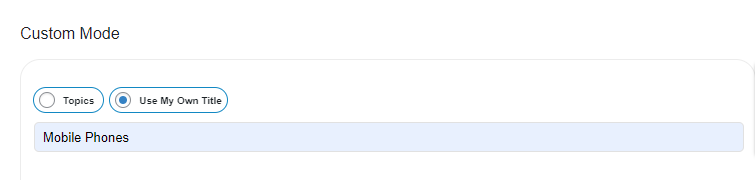
- If you choose Use My Own Title:
- The Suggest Titles button will be hidden.
- Enter your desired title in the text field without receiving suggestions.
Step 2: Generate Sections
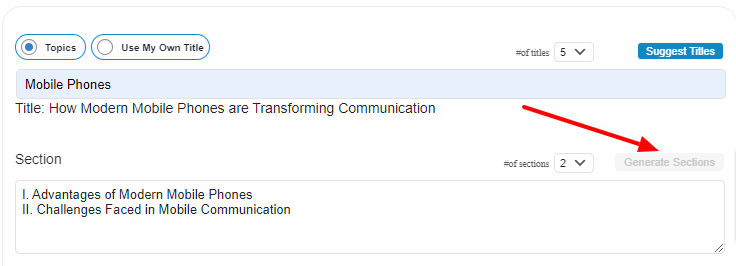
- Click the Generate Sections button to create sections for your content.
- Use the dropdown menu to select the desired number of sections (options: 2, 4, 6, 8, 10, 12; 4 is the default).
- The generated sections will be added to the Sections textarea, where you can modify, delete, or add sections as needed.
Step 3: Generate Content
- Click the Generate Content button to create content based on the selected sections.
- Use the dropdown menu to choose the number of paragraphs for each section (options: 1 to 10).
Step 4: Generate Excerpt
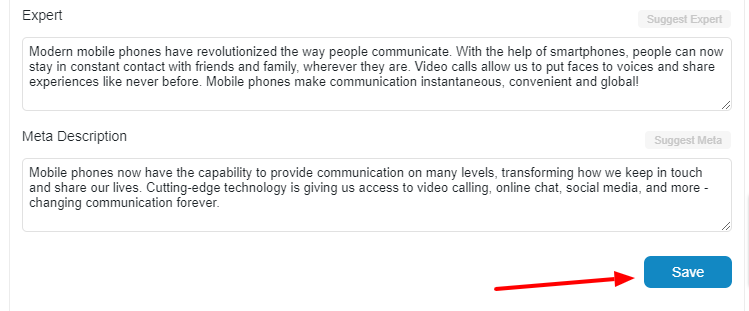
Click the Generate Excerpt button to create a summary of the generated content.

Step 5: Generate Meta Description
Click the Generate Meta button to produce a meta description based on the content.

Step 6: Review and Publish
Review the generated content, excerpt, and meta description.
If you’re satisfied with the results, click the Create Post button to convert your content into a shopify Blog post.
Settings in Custom Mode
Settings are located on the right side of the Custom Mode tab, allowing users to adjust AI parameters, prompts, and templates to meet their specific content generation requirements.
AI Parameters
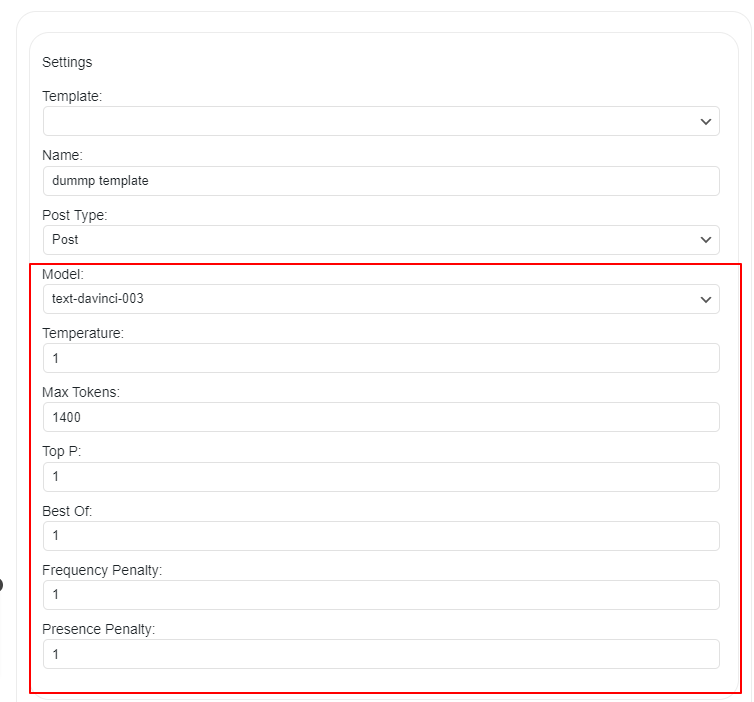
You can modify the GPT model settings, including model, temperature, top_p, frequency penalty, presence penalty, max tokens, and the best of parameter.
- Navigate to the “AI Parameters” section in Settings.
- Adjust the GPT model settings as needed.
Prompts
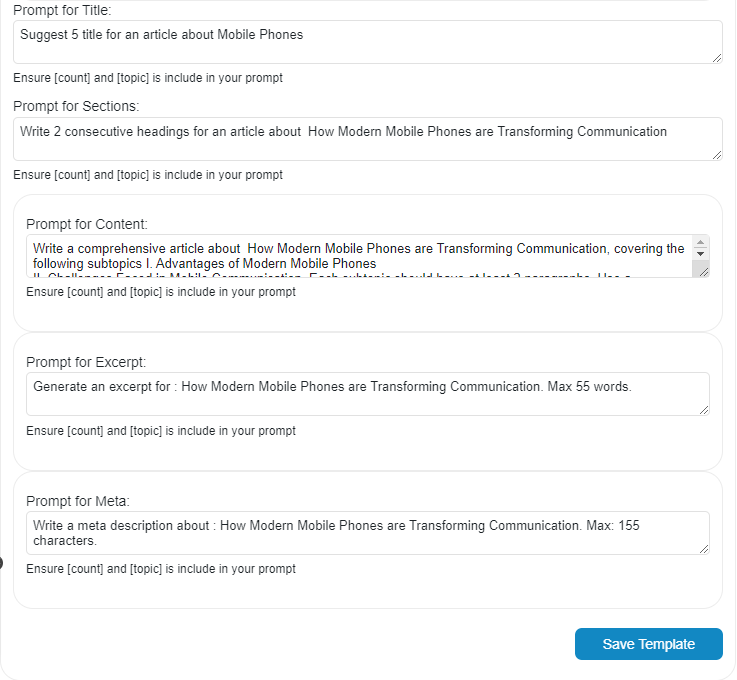
You can sustomize prompts for each content generation step, including title, sections, content, excerpt, and meta description.
Make sure to include the required variables in your custom prompt.
- Go to the Prompts section in Settings.
- Customize or translate the default prompts while maintaining the required variables.
- Title Prompt: “Suggest [count] title for an article about [topic]”
- Sections Prompt: “Write [count] consecutive headings for an article about [title]”
- Content Prompt: “Write a comprehensive article about [title], covering the following subtopics [sections]. Each subtopic should have at least [count] paragraphs. Use a cohesive structure to ensure smooth transitions between ideas. Include relevant statistics, examples, and quotes to support your arguments and engage the reader.”
- Excerpt Prompt: “Generate an excerpt for [title]. Max: 55 words.”
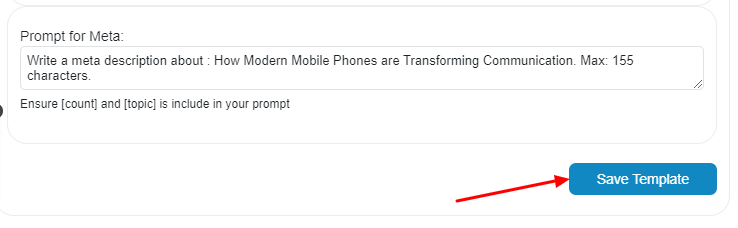
- Meta Prompt: “Write a meta description about [title]. Max: 155 characters.”
Templates
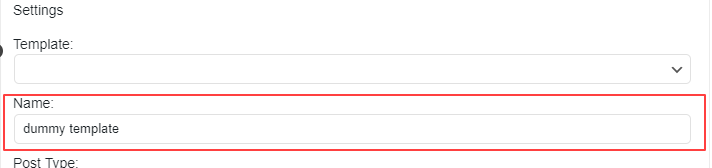
You can save your custom settings as templates for future use by providing a name for the template and selecting the post type (post or page).
- Scroll down to the Templates section in Settings.
- Enter a name for your template.
- Select the post type (post, page or your custom post types).
- Click the Save Template button to save your settings.
Later, you can select your saved templates from the Templates dropdown menu in the Settings section.